How to add Google Analytics code to WordPress – NO PLUGIN (2 steps)

Google Analytics is an extremely important tool for your website as it allows you to track and monitor any sort of interactions on your website. Things like link clicks, number of visitors and their location, purchases, form signups, and more can all be tracked to give you as a website owner, the power you need to make educated decisions that best suit your user’s needs and increase your conversions.
In this article, I’ll go over how to quickly add your Google Analytics tracking tag to your WordPress website manually. To get started you’ll need to have access to two things.
What you need:
(Make sure you are using a child theme if you choose this manual method. All changes made to the parent theme will be overwritten when the theme updates to a newer version.)
- Header.php file (found within your themes folder)
- Google Analytics tag
Step 1: Copy the Analytics tag code
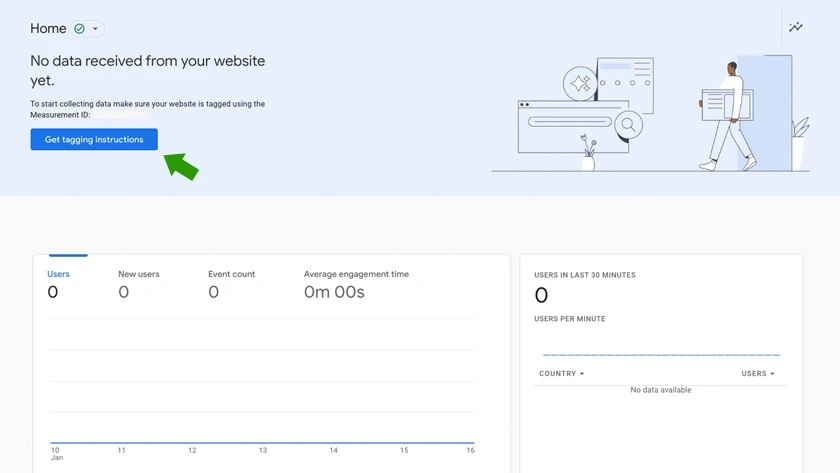
Once you’ve created a new Google Analytics property, from the homepage of the Google Analytics Dashboard, you’ll be asked to set up the tag on your website (You should see a call to action like the one pictured below.)

Click the blue button that says “Get tagging instructions”
A secondary dialogue window will open with a page with the installation instructions. (Your page should look like the one pictured below.) If the window doesn’t automatically open, click the yellow “View tag instructions” button in the top right-hand corner of the “Web Stream Details” popup.

Click “Install Manually” and embed code will show up.
Copy the embed code.
Step 2: Paste Analytics code in header.php file
With the embed code you just copied, open your WordPress theme’s header.php file and find the opening HTML <head> tag. You should be able to find this somewhere near the top of the page.
Paste that code immediately after the <head> tag and save your file.
Conclusion
Just like that in 2 steps you’ve successfully manually added your Google Analytics tag to your website. Now you can monitor all the activity on your website from within the Google Analytics dashboard.
If you’d not the developer type and would rather not have to touch any code, check out this article on how to add a Google Analytics tag to WordPress with a plugin.
If you’d completely like to keep it in the hands of a professional, we’d be glad to help get your Google Analytics tag set up for you so feel free to contact us.


